How to Set Up For Bench Press | Technique Tips for Beginner Powerlifters
Why does bench press set up matter?
The technique & success of your bench press starts with your set up. If you aren’t set up correctly, you may limit your strength and/or put yourself at a higher risk of injury.
Many people underestimate the importance of their set-up and/or just mimic the set-up of other lifters without understanding the reasons behind the set-up. Today, we’ll go over different bench press set-ups and how to find a set-up for your bench that works best for you.
Setting up Your Rack & Safety Height
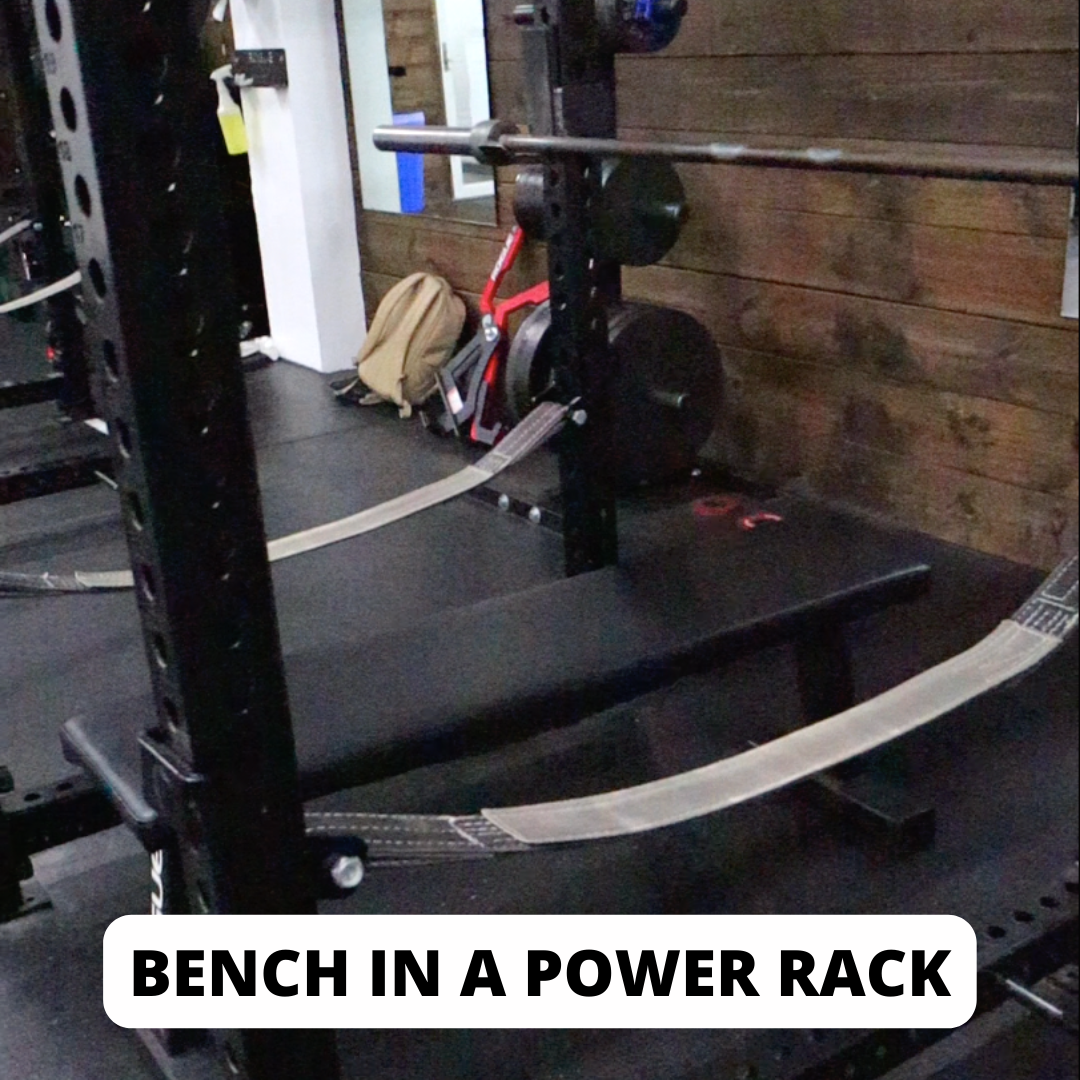
You’ll want to first start with setting your rack and safeties up on your bench. Not every bench has adjustable rack heights or even safety bars. In this case, you either have to work with what your gym offers or you can move into a squat or power rack if needed.

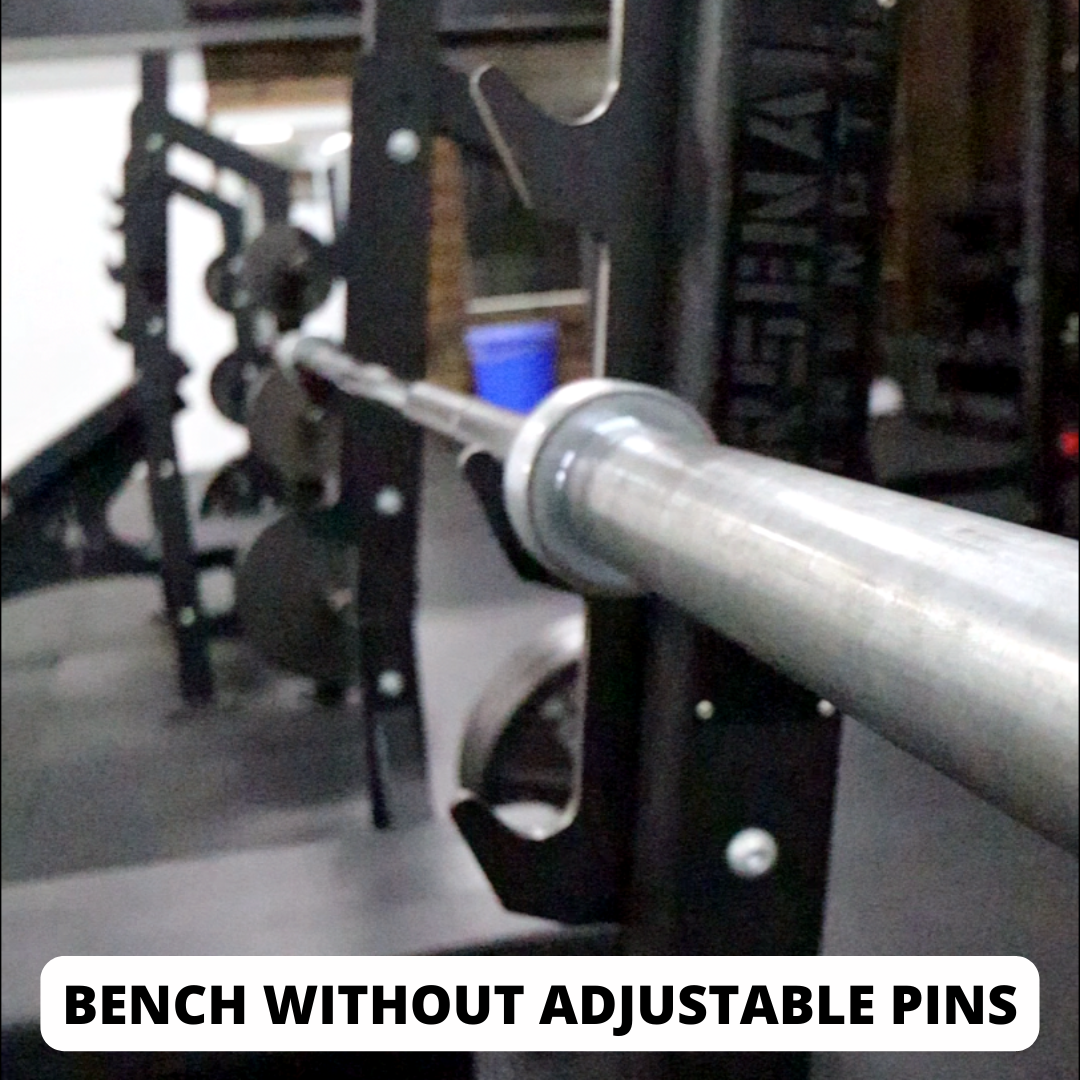
When it comes to your rack height, it should be set high enough that you can get your arms fully positioned and set underneath the bar and low enough that you’re able to safely un-rack and re-rack the bar while in your full set-up position.
Keep in mind, your set-up position may decrease your range of motion in comparison to if you were to lay flat under the bar and unrack.
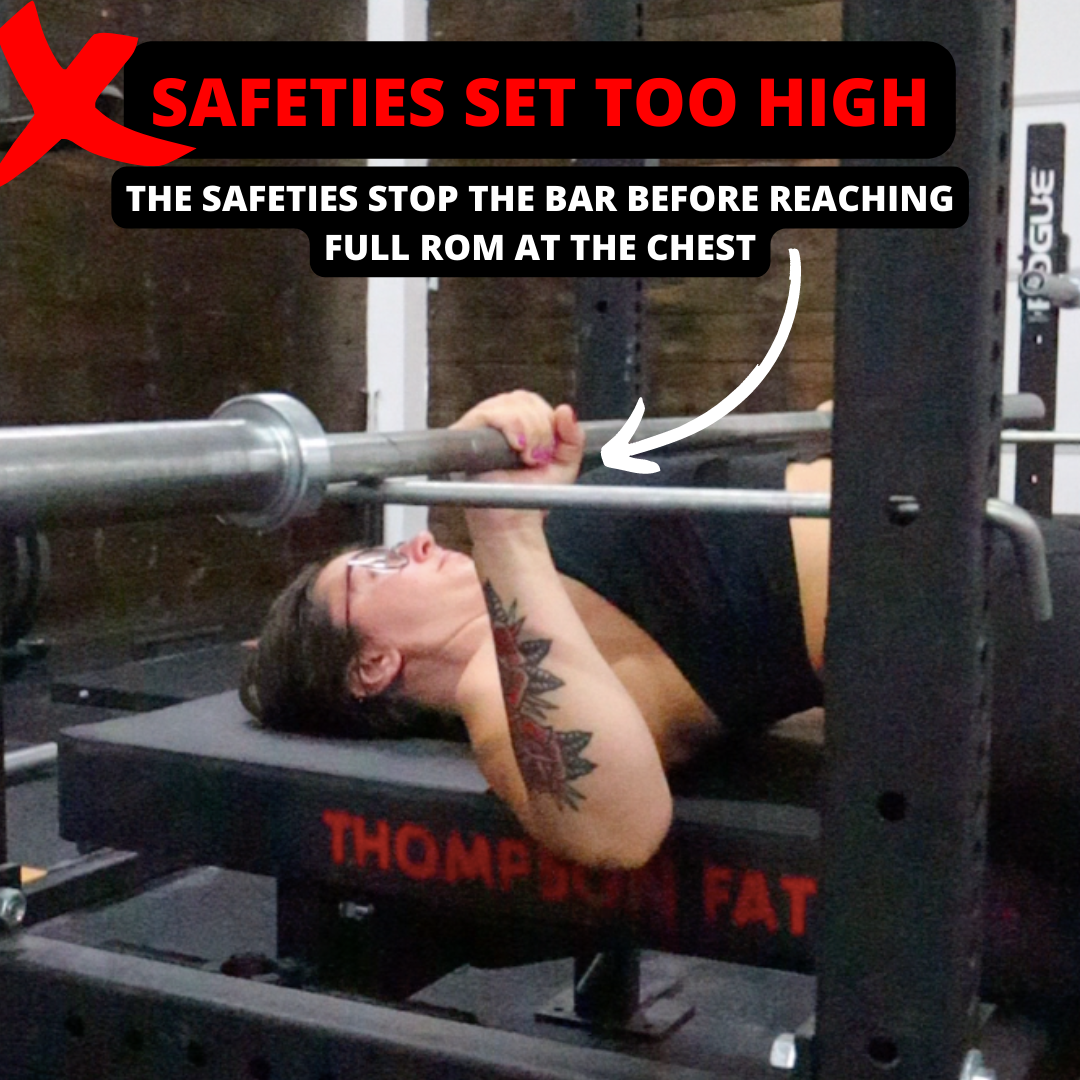
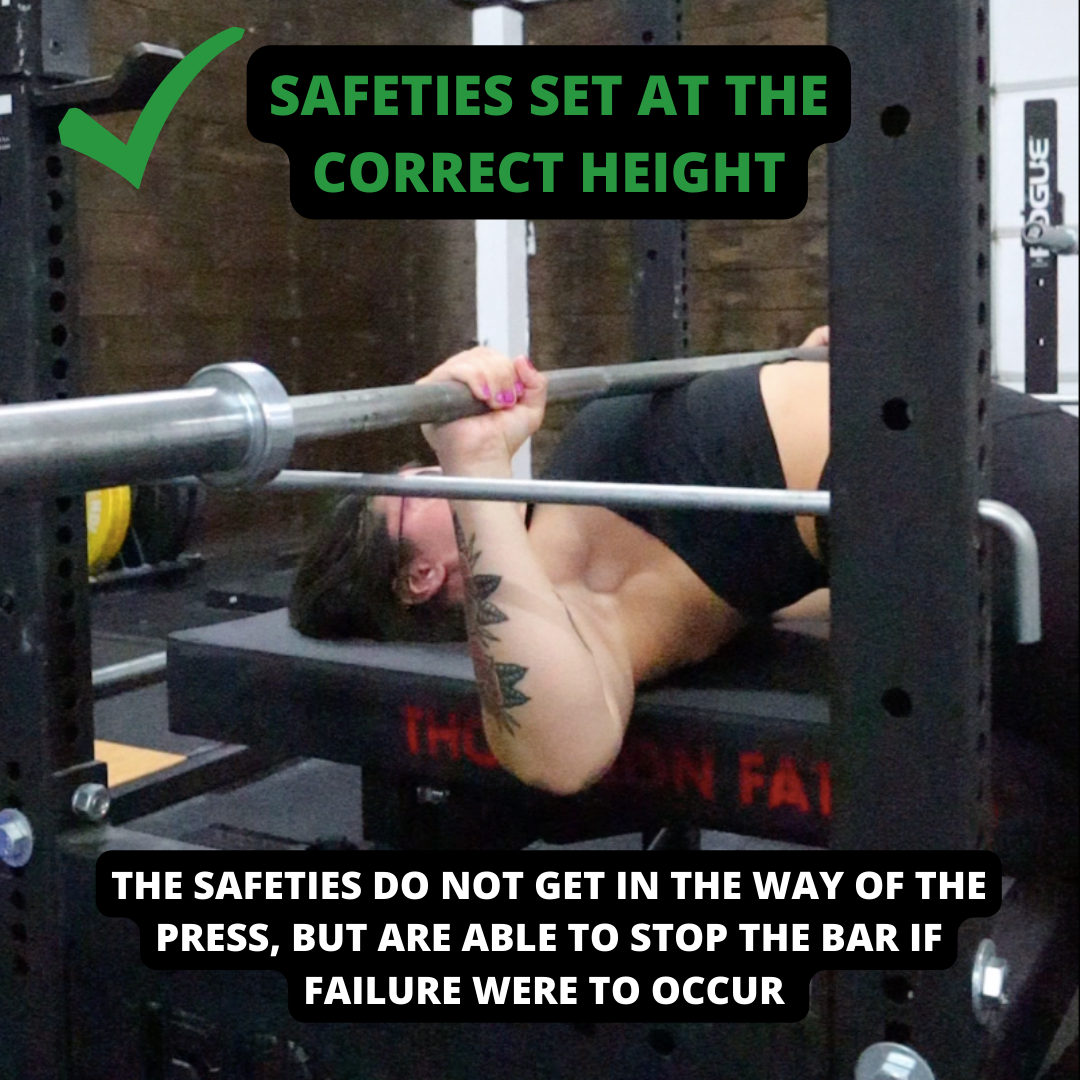
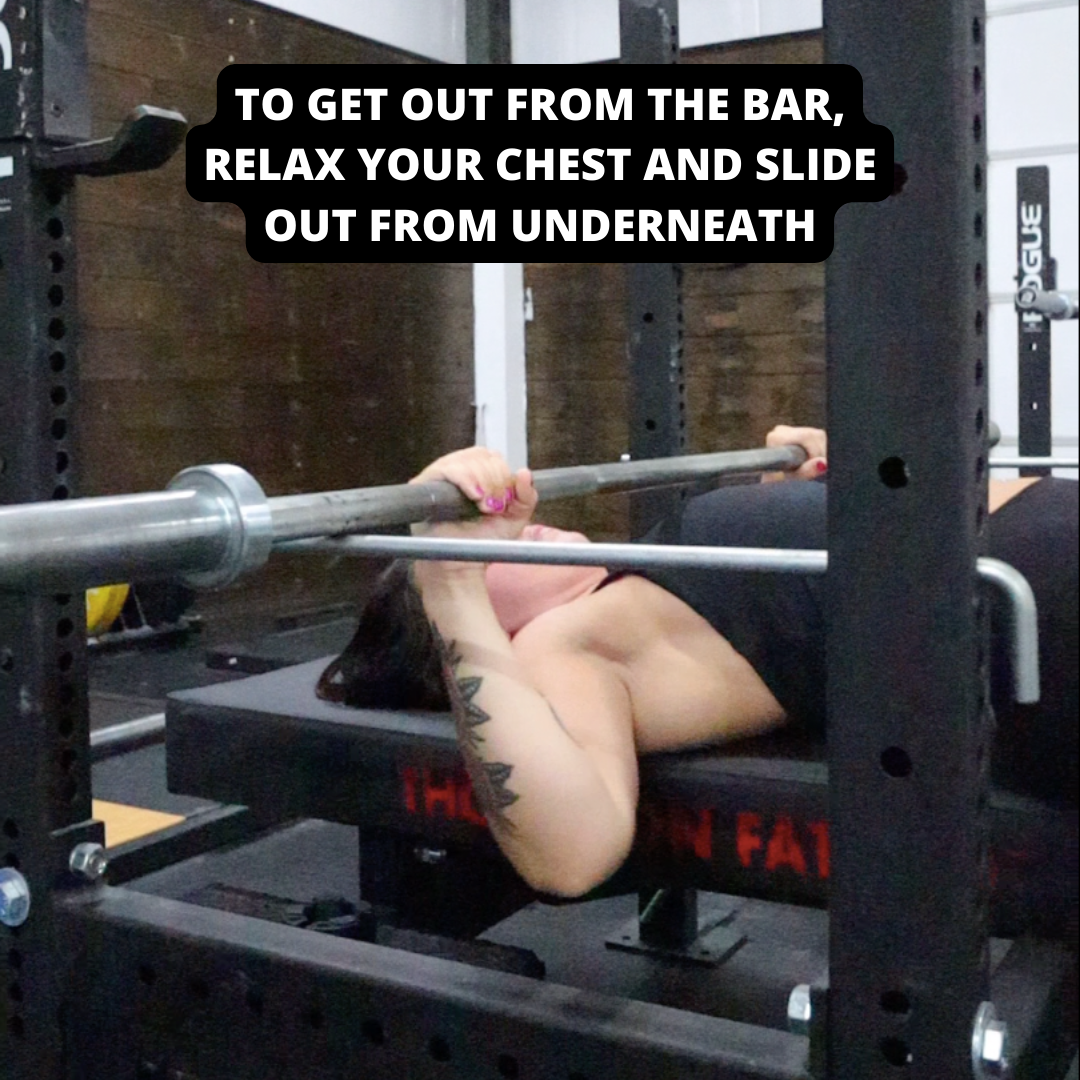
When it comes to the safeties, they should be set up high enough that it doesn’t limit your range of motion at the chest (aka the bar doesn’t hit the safeties when pressing), but low enough that it catches the bar if you fail. You may need to relax your traps and roll yourself under the bar when failing, but you should be able to do so safely in the correct position.
You will also want to test to make sure its set high enough that if the bar rolls back towards your face, that your neck and head will clear the bar with the safeties so that you can safely get out from under the bar. Test this without weight on the bar.

Setting Yourself Up Under the Bar
Everyone has a slightly different technique for set-up. You may see some lifters start with their feet up on the bench, pushing themselves backwards to help dig their traps into the bench and getting their back set.
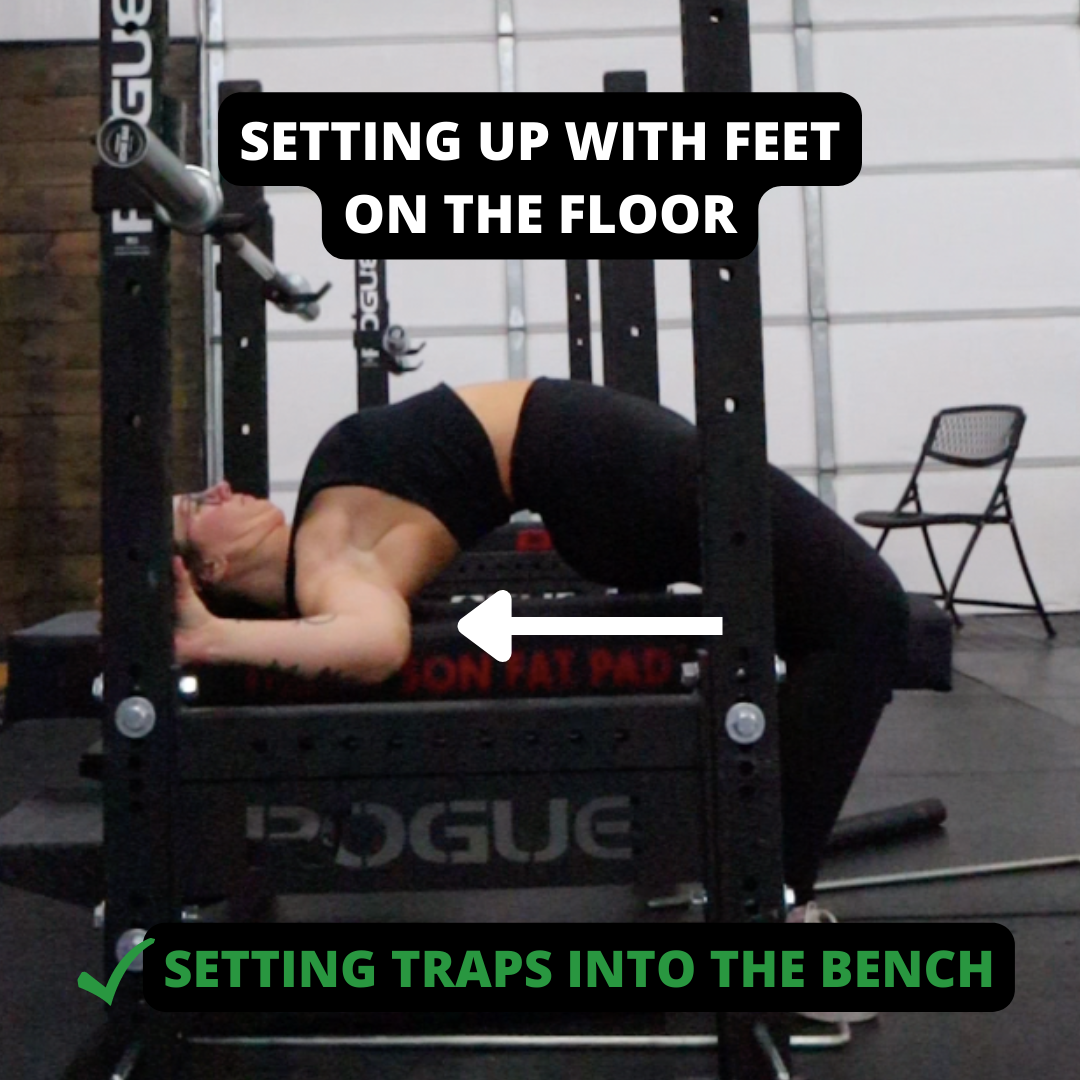
Other lifters start by laying down on the bench with their feet on the ground and setting up their traps from a more flat position by holding onto the sides of the bench to get their traps set. This technique is more common and a simpler set-up to get into. Choose whichever technique feels best for you
When getting under the bar, you want to position your body so that your chin is directly under the bar. Make sure that your traps and upper back are set in tight and “dig” into the bench, as this will allow for stability and help create “arch” in the bench (we’ll touch more on that shortly).

Placing Your Feet
Your foot placement is crucial in your bench press, as its one of the key factors in creating a stable base under heavy loads, as well as giving you the ability to use your legs optimally for leg drive.
You want to find a foot stance that allows you to be both stable and creates the best tension for leg drive. Keep in mind, the proper set up for bench oftentimes won’t be the most comfortable, especially when initially practicing your set-up technique. You may also need to work on improving mobility and flexibility in certain positions to help improve your set-up over time.
There are a few different foot stance variations for powerlifters. Generally, you want your knees to be stacked over your ankles in whichever stance you choose.
From there, you can play around with wide foot placement while leveraging the hips vs. narrow while squeezing the thighs into the bench. You may also want to play around with feet flat vs. driving through the toes, depending on your powerlifting federation.
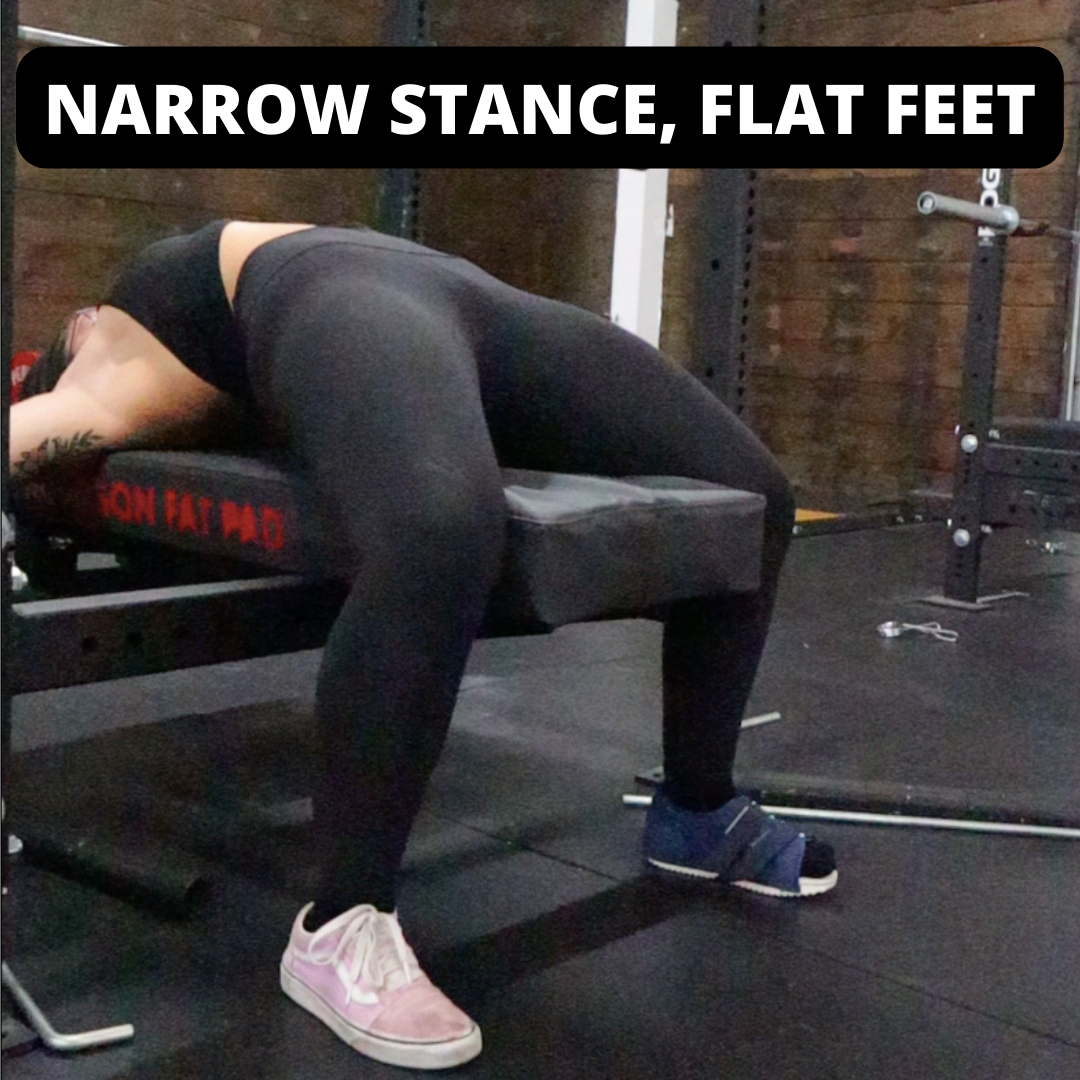
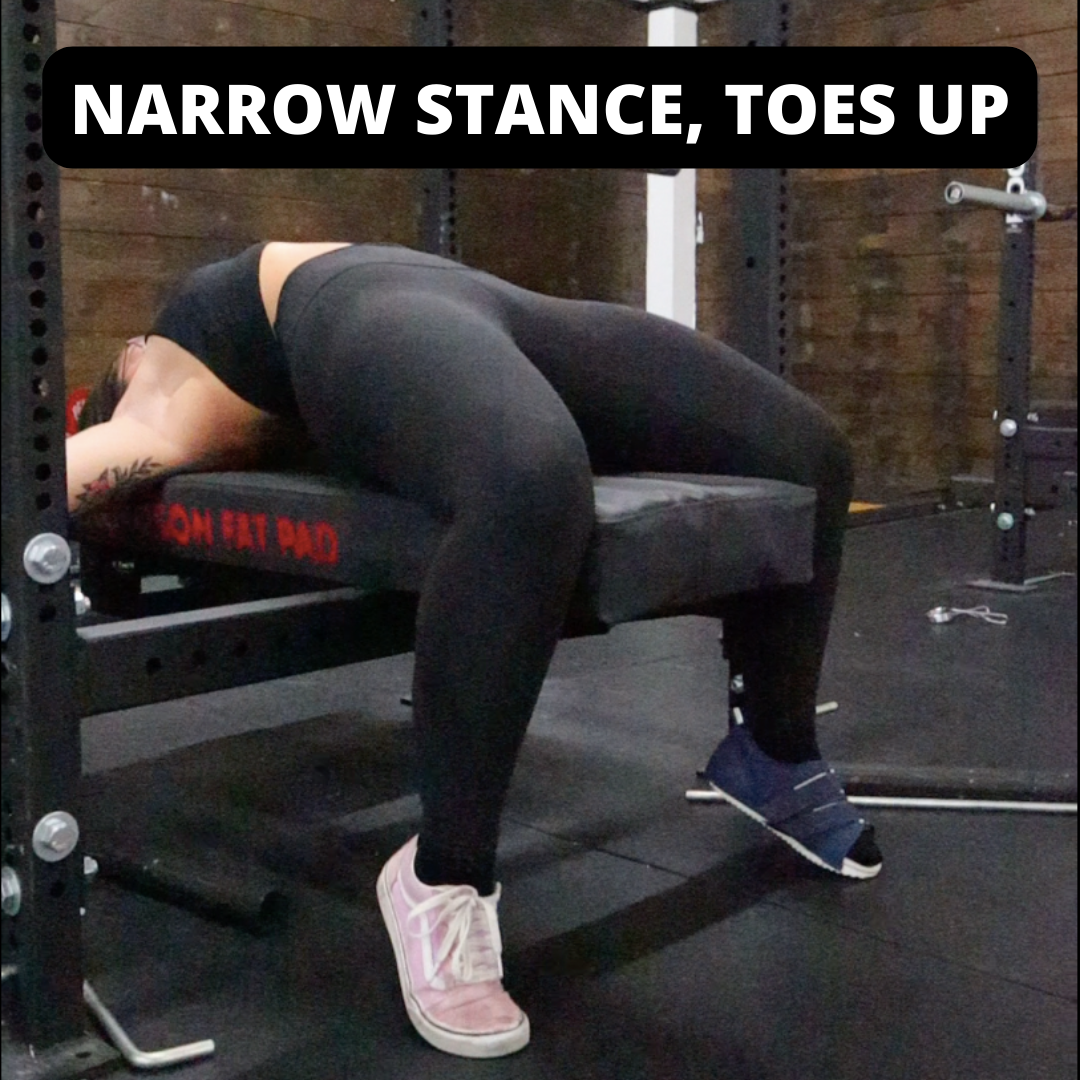

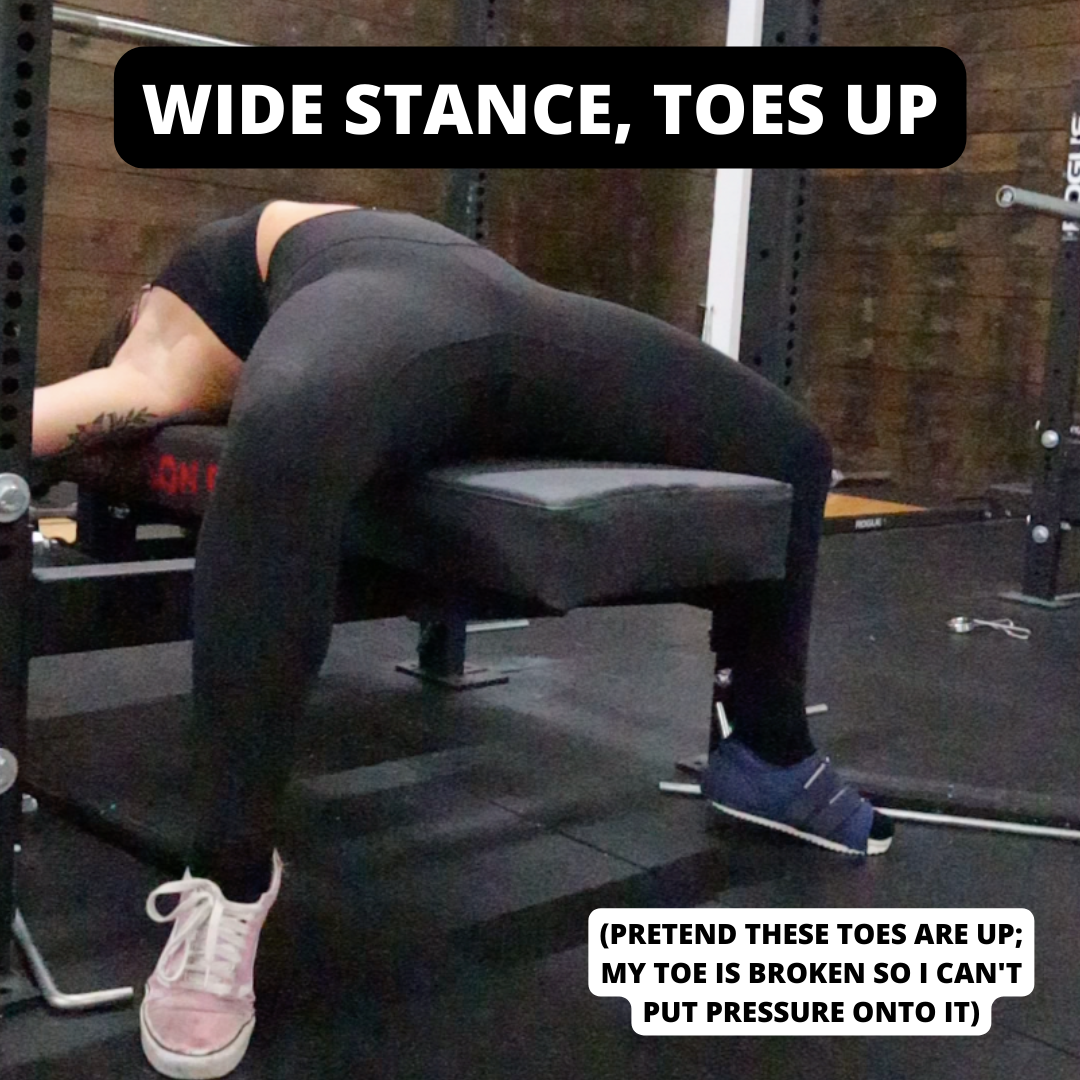
Practice different foot stance variations to find what works best for you to best enable leg drive. You should be able to effectively drive your feet into the ground, but thinking of pushing or driving back rather directly driving into the ground to avoid your hips from lifting from the bench.
If your back is set correctly into the bench in the step before this, you will not actually move backwards with the force, and instead remain stable, but explosive through the leg drive.


Creating the Bench “Arch”
Once your back and feet are set, this is oftentimes where you’ll see the lifter’s arch created. These two techniques, despite much online debate (similar to the sumo vs. conventional debate), are both generally safe for most powerlifters.
If you’ve had previous spinal injuries or poor flexibility, you may have limitations in setting your feet, which will also limit the amount of arch.
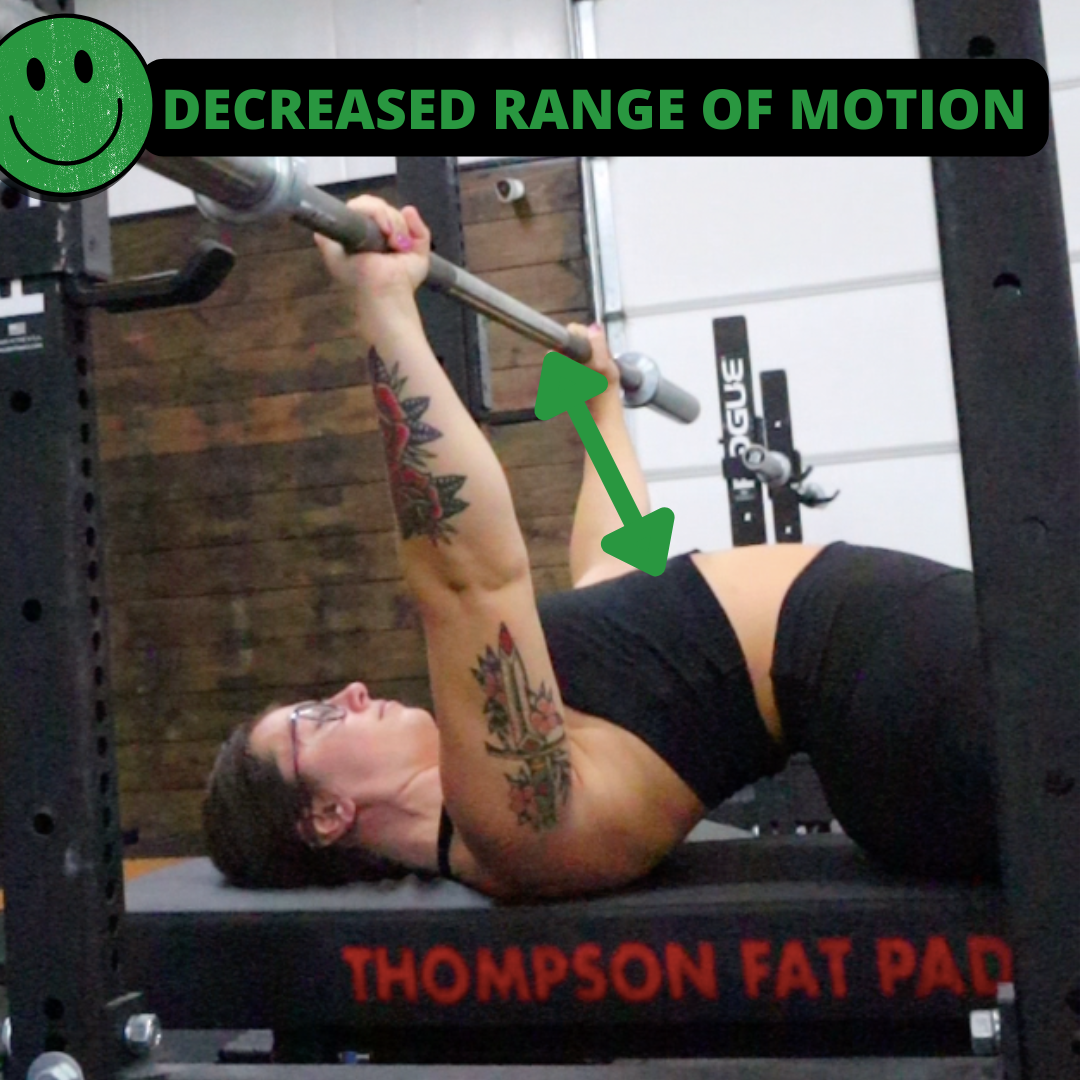
The benefit of the arch is to create stability for the lift (coming from the legs and back being set properly), as well helping to decrease the range of motion of the bench press. Having less range of motion to go through means there is less exertion for the lifter, giving them an advantage in the bench. Most powerlifters who have the ability to arch in competition will do so (and those who haven’t mastered it are the one’s who will complain that it’s cheating or that it will lead to injury. Eye roll.).

When you’re close to competition, it’s important to practice your technique for competition with the arch included in that technique. This is usually labeled the “competition style bench.”
Further out from competition though, and depending on what needs improved in your off season, it may be more important to focus on increasing your range of motion to continue building muscle and strength, using bench variations and less of the “competition style bench".” This may mean that you’ll minimize the arch in the bench press through different variations, such as the Larsen press, while still ensuring stability through the back and legs.
If improving your set-up and your arch is something you want to work on, even if you’re far out from competition, it may still be a good idea to practice and utilize this in your technique. If this technique is something you already have nailed down, you may not have to put as much emphasis on it when you’re further out from competition.
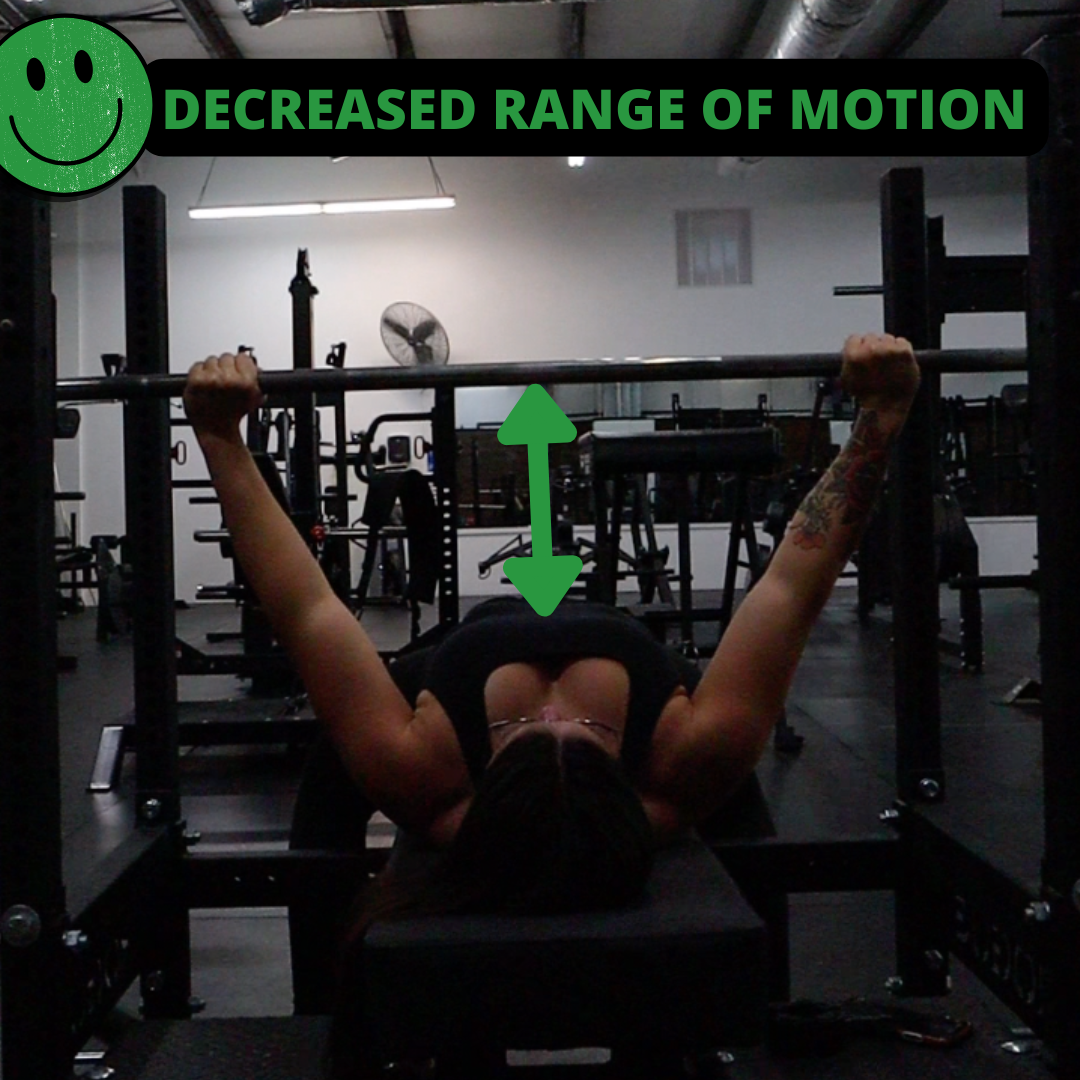
Gripping the Bar: Wide vs. Narrow Grip
There are different grip variations you can utilize for your competition style bench as well, anywhere from a wide to more narrow grip. Most lifters opt for a wider bench (more shoulder dominant) because of the decreased range of motion. The more narrow (more tricep dominant), you get with your bench press, the more range of motion you’ll have to work through.
If you’re unsure of where to start, start with your pinkies touching near the ring on the bar (just outside of the knurling), and work from there! You’ll start to get an idea of which is best as you play around with it.

Going too wide or narrow may cause you to experience pain or stress in the wrists, shoulders, and elbows or you may just have to work harder than others by working through more range of motion, giving yourself an avoidable disadvantage in competition.
When you grab the bar, you’ll want to make sure you’re gripping with your thumbs wrapped around the bar rather than utilizing the “false” or “suicide” grip. Wrapping your thumbs around the bar allows for better grip and is also the safest way to hold the bar.
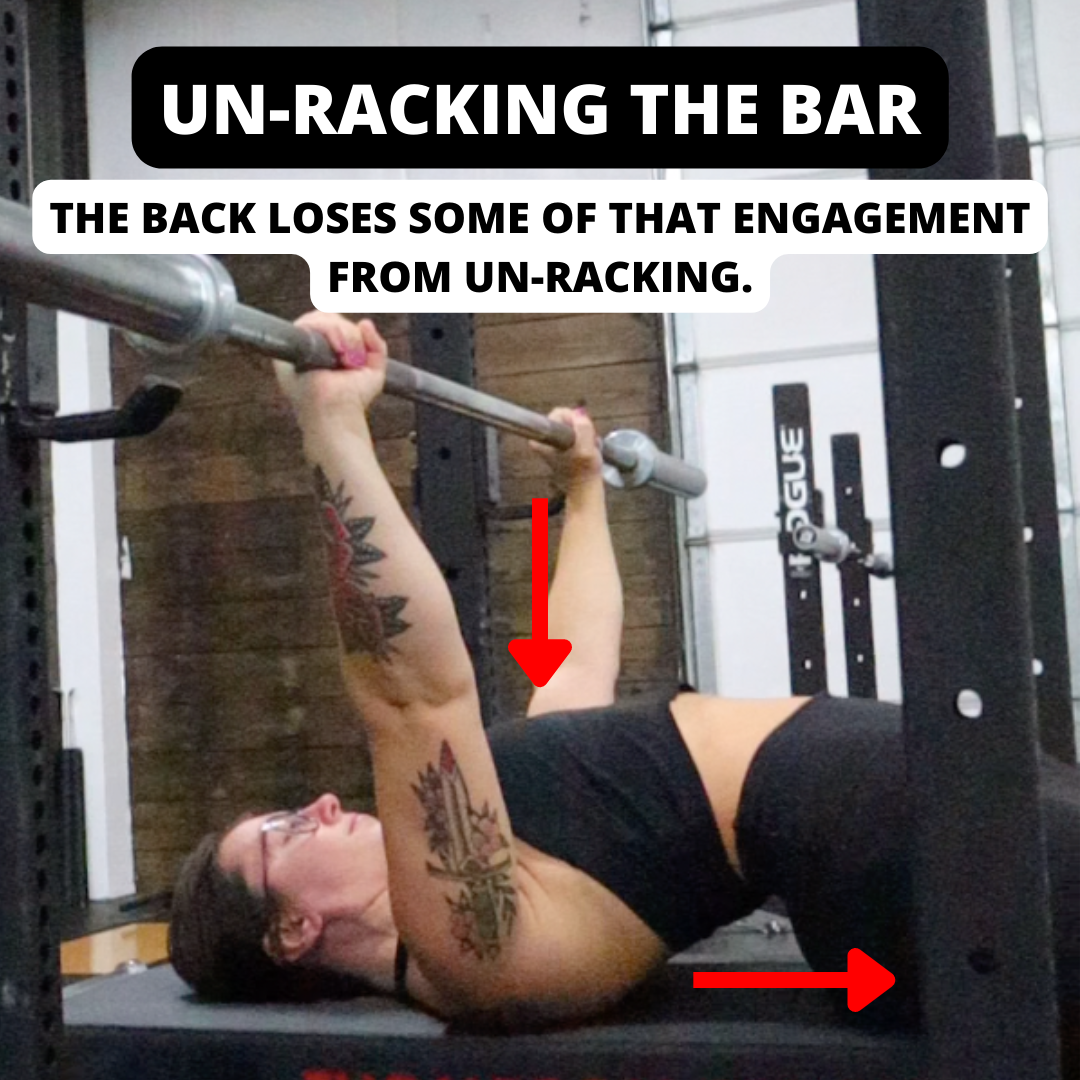
Un-Racking the Bar
Keep your entire body engaged when un-racking the weight, leg drive and all. Once the bar is un-racked, you’ll want to reset your lats because the un-racking of the bar itself can cause you to lose some of that tension.

Make sure you’re gripping the bar hard and squeezing with the pinkies to “bend the bar.” This helps to cue additional lat engagement and keep the bar stacked over your wrists.
From there, you’re ready to begin your press!
Putting It All Together:
Set up your rack & safeties
Set your traps into the bench
Place your feet
Grip the bar & un-rack
Reset your lats
Begin the press & ensure leg drive and tension throughout the press
Good luck & good lifting!


